
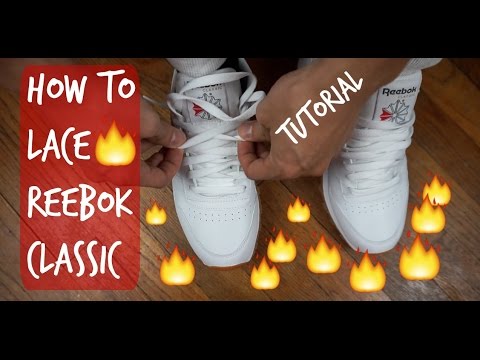
Reebok Classic Nylon is one of the most popular sneakers in the market. It is comfortable, stylish, and versatile, making it a favorite among sneaker enthusiasts. However, lacing your Reebok Classic Nylon can be a bit tricky, especially if you want to achieve a particular look or fit.
In this article, we will guide you through the different lacing techniques for Reebok Classic Nylon. Whether you want to achieve a secure fit or a unique style, we got you covered. So, let’s dive in and learn how to lace your Reebok Classic Nylon like a pro!
- Start by unlacing the shoes completely.
- Insert one end of the lace into the bottom left eyelet, leaving an equal length on each side.
- Take the left end of the lace and insert it into the second eyelet on the right side.
- Take the right end of the lace and insert it into the second eyelet on the left side.
- Continue lacing the shoes in this crisscross pattern until you reach the top.
- Once you reach the top, tie the ends of the laces in a knot or a bow, depending on your preference.
How to Lace Reebok Classic Nylon: A Step-by-Step Guide
1. Start with the Basic Lacing Method
Begin by inserting the lace into the bottom eyelets of the shoes, making sure that both ends are of equal length. Cross the left lace over the right and insert into the next eyelet on the opposite side. Pull tight and repeat until you reach the top two eyelets, leaving enough lace to tie the shoes.
Once you reach the top two eyelets, insert each end of the lace into the corresponding hole. Cross the left lace over the right and tie the shoes in a bow or knot.
| Benefits | VS |
|---|---|
| Simple and easy to do | May not be secure enough for certain activities |
2. The Over-Under Lacing Method
This method gives the shoes a more secure fit and is commonly used by athletes. Begin by inserting the lace into the bottom eyelets of the shoes, making sure that both ends are of equal length. Take the left lace and insert it over the right and under the next eyelet on the opposite side. Take the right lace and insert it under the left and over the next eyelet on the opposite side. Repeat until you reach the top two eyelets, leaving enough lace to tie the shoes.
Once you reach the top two eyelets, insert each end of the lace into the corresponding hole. Cross the left lace over the right and tie the shoes in a bow or knot.
| Benefits | VS |
|---|---|
| Provides a more secure fit | May take longer to do |
3. The Straight Bar Lacing Method
This method gives the shoes a unique look and is perfect for those who want to stand out. Begin by inserting the lace into the bottom eyelets of the shoes, making sure that both ends are of equal length. Take the left lace and insert it into the right eyelet on the same side. Take the right lace and insert it into the left eyelet on the same side. Cross the left lace over the right and insert it into the adjacent eyelet on the opposite side. Cross the right lace over the left and insert it into the adjacent eyelet on the opposite side. Repeat until you reach the top two eyelets, leaving enough lace to tie the shoes.
Once you reach the top two eyelets, insert each end of the lace into the corresponding hole. Cross the left lace over the right and tie the shoes in a bow or knot.
| Benefits | VS |
|---|---|
| Gives the shoes a unique look | May not be suitable for certain activities |
4. The Double Helix Lacing Method
This method is perfect for those who want to add some flair to their shoes. Begin by inserting the lace into the bottom eyelets of the shoes, making sure that both ends are of equal length. Take the left lace and insert it into the right eyelet on the same side. Take the right lace and insert it into the left eyelet on the same side. Cross the left lace over the right and insert it into the adjacent eyelet on the opposite side. Cross the right lace over the left and insert it into the adjacent eyelet on the opposite side. Take the left lace and insert it into the second eyelet down on the same side. Take the right lace and insert it into the second eyelet down on the opposite side. Repeat until you reach the top two eyelets, leaving enough lace to tie the shoes.
Once you reach the top two eyelets, insert each end of the lace into the corresponding hole. Cross the left lace over the right and tie the shoes in a bow or knot.
| Benefits | VS |
|---|---|
| Adds flair and style to the shoes | May be difficult to do for some people |
5. The Spider Web Lacing Method
This method is perfect for those who want to add some creativity to their shoes. Begin by inserting the lace into the bottom eyelets of the shoes, making sure that both ends are of equal length. Take the left lace and insert it into the right eyelet on the same side. Take the right lace and insert it into the left eyelet on the same side. Cross the left lace over the right and insert it into the adjacent eyelet on the opposite side. Cross the right lace over the left and insert it into the next eyelet down on the opposite side. Take the left lace and insert it into the second eyelet down on the same side. Take the right lace and insert it into the second eyelet down on the opposite side. Repeat until you reach the top two eyelets, leaving enough lace to tie the shoes.
Once you reach the top two eyelets, insert each end of the lace into the corresponding hole. Cross the left lace over the right and tie the shoes in a bow or knot.
| Benefits | VS |
|---|---|
| Adds creativity and style to the shoes | May be difficult to do for some people |
6. The Army Lacing Method
This method is perfect for those who want a secure fit and a professional look. Begin by inserting the lace into the bottom eyelets of the shoes, making sure that both ends are of equal length. Take the left lace and insert it into the right eyelet on the same side. Take the right lace and insert it into the left eyelet on the same side. Cross the left lace over the right and insert it into the adjacent eyelet on the opposite side. Cross the right lace over the left and insert it into the adjacent eyelet on the opposite side. Continue this pattern until you reach the top two eyelets, leaving enough lace to tie the shoes.
Once you reach the top two eyelets, insert each end of the lace into the corresponding hole. Cross the left lace over the right and tie the shoes in a bow or knot.
| Benefits | VS |
|---|---|
| Provides a secure fit and a professional look | May take longer to do |
7. The Zipper Lacing Method
This method is perfect for those who want to make it easier to put on and take off their shoes. Begin by inserting the lace into the bottom eyelets of the shoes, making sure that both ends are of equal length. Take the left lace and insert it into the right eyelet on the same side. Take the right lace and insert it into the left eyelet on the same side. Cross the left lace over the right and insert it into the adjacent eyelet on the opposite side. Cross the right lace over the left and insert it into the adjacent eyelet on the opposite side. Take the left lace and insert it into the next eyelet down on the same side. Take the right lace and insert it into the next eyelet down on the opposite side. Repeat until you reach the top two eyelets, leaving enough lace to tie the shoes.
Once you reach the top two eyelets, insert each end of the lace into the corresponding hole. Cross the left lace over the right and tie the shoes in a bow or knot. Then, tie the two ends of the lace together in a knot or bow, creating a zipper-like closure.
| Benefits | VS |
|---|---|
| Makes it easier to put on and take off the shoes | May not be suitable for certain activities |
8. The Hidden Knot Lacing Method
This method is perfect for those who want a clean and polished look. Begin by inserting the lace into the bottom eyelets of the shoes, making sure that both ends are of equal length. Take the left lace and insert it into the right eyelet on the same side. Take the right lace and insert it into the left eyelet on the same side. Cross the left lace over the right and insert it into the adjacent eyelet on the opposite side. Cross the right lace over the left and insert it into the adjacent eyelet on the opposite side. Take the left lace and insert it into the next eyelet down on the same side. Take the right lace and insert it into the next eyelet down on the opposite side. Repeat until you reach the top two eyelets, leaving enough lace to tie the shoes.
Once you reach the top two eyelets, insert each end of the lace into the corresponding hole. Cross the left lace over the right and tie the shoes in a knot. Then, tuck the knot under the laces, creating a hidden knot.
| Benefits | VS |
|---|---|
| Gives the shoes a clean and polished look | May not be as secure as other methods |
9. The Bowtie Lacing Method
This method is perfect for those who want to add some elegance to their shoes. Begin by inserting the lace into the bottom eyelets of the shoes, making sure that both ends are of equal length. Take the left lace and insert it into the right eyelet on the same side. Take the right lace and insert it into the left eyelet on the same side. Cross the left lace over the right and insert it into the adjacent eyelet on the opposite side. Cross the right lace over the left and insert it into the adjacent eyelet on the opposite side. Take the left lace and insert it into the next eyelet down on the same side. Take the right lace and insert it into the next eyelet down on the opposite side. Repeat until you reach the top two eyelets, leaving enough lace to tie the shoes.
Once you reach the top two eyelets, insert each end of the lace into the corresponding hole. Cross the left lace over the right and tie the shoes in a bow. Then, take the loops of the bow and tie them into a second bowtie, creating an elegant look.
| Benefits | VS |
|---|---|
| Adds elegance and style to the shoes | May not be suitable for certain activities |
10. The No-Tie Lacing Method
This method is perfect for those who want to save time and avoid the hassle of tying their shoes. Begin by inserting the lace into the bottom eyelets of the shoes, making sure that both ends are of equal length. Take the left lace and insert it into the right eyelet on the same side. Take the right lace and insert it into the left eyelet on the same side. Cross the left lace over the right and insert it into the adjacent eyelet on the opposite side. Cross the right lace over the left and insert it into the adjacent eyelet on the opposite side. Take the left lace and insert it into the next eyelet down on the same side. Take the right lace and insert it into the next eyelet down on the opposite side. Repeat until you reach the top two eyelets, leaving enough lace to tie the shoes.
Once you reach the top two eyelets, insert each end of the lace into the corresponding hole. Cross the left lace over the right and tie a knot at the top. Then, tuck the ends of the lace under the laces, creating a no-tie look.
| Benefits | VS |
|---|---|
| Saves time and avoids the hassle of tying shoes | May not provide a secure fit for certain activities |
In conclusion, there are many ways to lace your Reebok Classic Nylon shoes. Whether you’re looking for a secure fit, a unique look, or a no-tie option, there’s a lacing method that’s perfect for you. So, try out these methods and find the one that works best for you and your style.
Frequently Asked Questions
Find the answers to the most common questions about how to lace Reebok Classic Nylon shoes.
What are the different lacing techniques for Reebok Classic Nylon shoes?
There are several lacing techniques that you can use to lace your Reebok Classic Nylon shoes. The most common technique is the criss-cross method, where you alternate the laces over and under each set of eyelets until you reach the top. Another popular technique is the straight bar method, where you lace the laces straight across each set of eyelets. You can also try the ladder method or the loop back method for a unique look.
Whichever method you choose, make sure to keep the tension even and tight as you lace up your shoes. This will help to keep your shoes snug and secure on your feet.
How do I lace my Reebok Classic Nylon shoes for a snug fit?
If you want a snug fit for your Reebok Classic Nylon shoes, try the straight bar lacing technique. This method helps to distribute the pressure evenly across your foot, providing a comfortable, secure fit. To use this technique, start by lacing the bottom eyelets normally, then skip the next set of eyelets and lace straight across the third set. Continue lacing straight across each set of eyelets until you reach the top.
Once you reach the top, tie your laces tightly and adjust the fit as needed. You should feel a snug, comfortable fit that keeps your foot securely in place.
How do I lace my Reebok Classic Nylon shoes for a looser fit?
If you prefer a looser fit for your Reebok Classic Nylon shoes, try the criss-cross lacing technique. This method provides a more flexible fit that allows your foot to move more freely. To use this technique, start by lacing normally at the bottom, then cross the laces over each other and thread them through the next set of eyelets. Continue criss-cross lacing all the way up to the top.
Once you reach the top, tie your laces loosely and adjust the fit as needed. You should feel a comfortable, relaxed fit that allows your foot to move naturally.
How do I lace my Reebok Classic Nylon shoes for a fashionable look?
If you want to add a stylish touch to your Reebok Classic Nylon shoes, try the loop back lacing technique. This method creates a loop at each set of eyelets, giving your shoes a unique, eye-catching look. To use this technique, start by lacing normally at the bottom, then loop the laces back through each set of eyelets, alternating between left and right.
Once you reach the top, tie your laces in a knot or bow and adjust the loops for a balanced, symmetrical look. You should feel confident and stylish in your new laced-up shoes!
How do I clean my Reebok Classic Nylon shoes after lacing them?
After lacing your Reebok Classic Nylon shoes, you may want to give them a good cleaning to keep them looking fresh and new. To clean your shoes, start by removing any loose dirt or debris with a soft brush or cloth. Then, mix a small amount of mild detergent with warm water and use a sponge or cloth to gently scrub the surface of the shoes.
Rinse the shoes thoroughly with clean water and let them air dry completely before wearing them again. Avoid using harsh chemicals or abrasive materials that could damage the fabric or laces of your shoes.
How to lace Reebok
In conclusion, lacing your Reebok Classic Nylon shoes should not be a daunting task anymore. With the right technique, you can achieve a stylish and comfortable fit that complements your fashion sense. Remember to choose the right lacing style that works for you, and don’t be afraid to experiment with different patterns to add some flair to your outfit.
Additionally, always ensure that your laces are tight enough to keep your feet secure inside the shoe, but not too tight that they cut off circulation. This will prevent any discomfort or injuries while walking or running.
Lastly, don’t forget to take good care of your Reebok Classic Nylon shoes. Regular cleaning and maintenance will prolong their lifespan and keep them looking great. With these tips, you can enjoy your Reebok Classic Nylon shoes for many years to come.